Animation along a path
Part 1
Create a new Flash document.
Use the oval tool to draw a circle on the stage at frame 1, layer 1. Select the circle and press F8 convert it to a graphic symbol naming it ball.
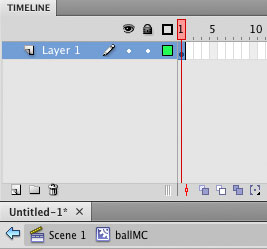
You should see the ball in the library (Ctrl+L). Delete the ball instance from the stage and select Insert / New Symbol this time select movie clip and name it ballMC.
You will know be in the ballMC’s timeline as below:
Drag a copy of the ball graphic to the stage so that it is on frame 1 layer 1. Select Insert / Motion Tween and this will create a 24 frame animation. Move the ball to another location on the stage and you will see the tween path.

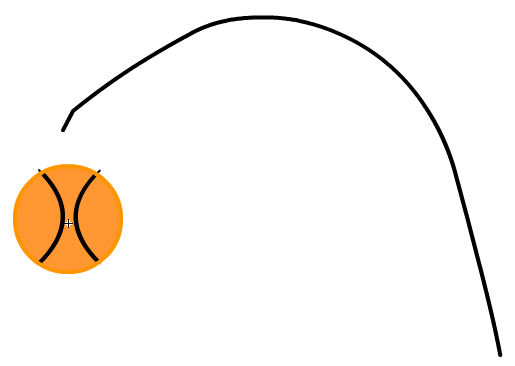
Delete the motion path by selecting it and pressing delete. Now create a new layer and using the pencil tool draw a path like below.
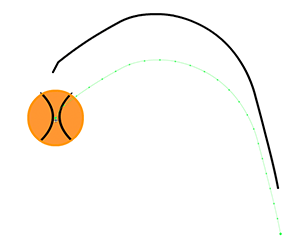
Double click on the path and then edit / copy, to copy the path. Now move to the layer containing the bal, select it and edit /paste centre to paste the path creating a motion guide.
Delete the layer above layer 1.
Click on Scene 1 to return to the main time line and drag a copy of ballMC to the stage and test your movie. Control / Test Movie save your animation as ballpath.fla.
Part 2
We are going to continue to look at motion paths and also look at layers.
Create a new flash document and using the oval tool and the pen tool draw a basket ball.
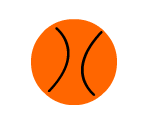
Select the basket ball and press F8 to convert it to a symbol, select graphic and name it ball.
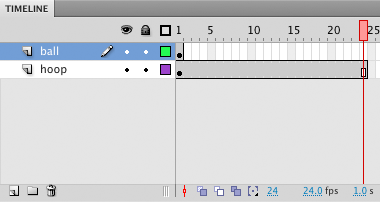
Double click on layer 1 and rename it ball.
Insert a new layer and rename this hoop.
Drag the hoop layer so that it is below the ball layer. Then use the drawing tools to draw a basket ball hoop, ensure it is on the hoop layer.
Then right click on frame 24 of the hoop layer and just insert a frame (or press F5). Your timeline should look like below
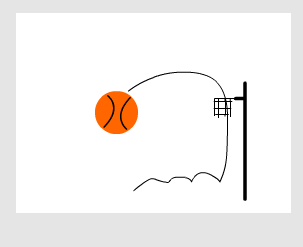
Now using the same techniques as part one for creating a motion guide similar to below. The idea is that the ball will fly through the air and land in the hoop.
Once you have created the animation move the playhead to just before the ball enters the hoop and open the transform panel.
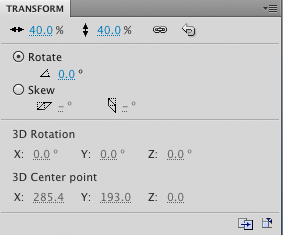
Click the constrain box and then type in 40% (you might need to change the size depending on your hoop and ball size).
Then control / test movie to see the animation. Notice how it keeps looping round, we want the animation to stop once the ball has landed, therefore we need to use Actionscript.
Create a new layer, and name it actions. Right click on frame 24 of the actions layer and insert a keyframe.
With frame 24 of the actions layer selected press F9 to open the actions panel
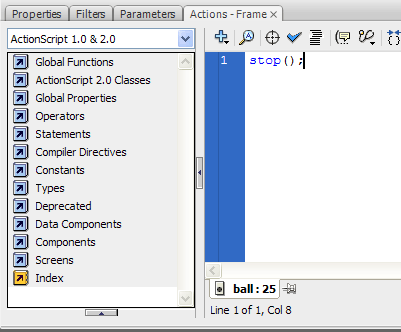
and type
stop();
Now select control / test movie and view your animation, this time it will only loop through once.
Save your file as basketball.fla.
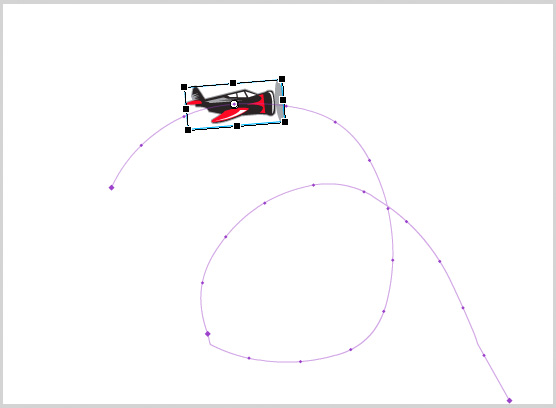
Excercise
Download plane.fla and see if you can animate the plane doing a loop the loop.